
My boys are completed obsessed with cars, trucks, airplanes, and trains. I wanted to make them something that would be good to take with us somewhere to help keep them entertained.
Here's my take on a car mat.

Firstly, I'm not quite a sew-er. Before this, I've only made crayon rolls. And this isn't quite a tutorial, since I winged it. But, there are step by step photos to show you what I did.
Here's what I started with:

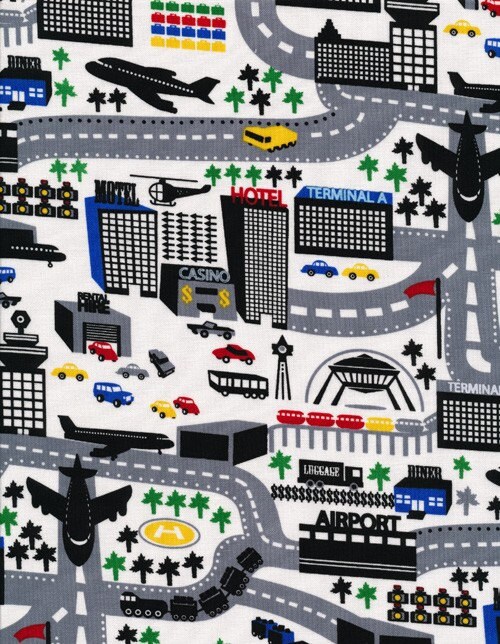
The fabric was Timeless Treasures Airport Bright with Multiple Choice Black purchased from UberStitch on Etsy. Here are the details, how cute is that all the boys favorites are incorporated right into this fabric.
I convo'd UberStitch for a coordinating fabric suggestion. She made a fantastic choice.

Late night Saturday in our house, this is what my husband stayed up late watching while I set up shop on our coffee table

First step: add velcro to coordinating fabric for car/plane pockets.

Other side of Velcro goes on the pocket material. I chose black felt. I wasn't concerned with stretching since the Velcro would act as a stabilizer.

Sew on pocket. Sew tunnels for individual cars. I just laid the cars & planes down as a guide.

With right sides together, sew around 3 sides.

Flip and press.

Fold and press a hem for your unfinished side. Sew all 4 sides. Don't forget your loop of elastic to hold your roll together. I backstitched for added strength.

Here is the finished product on the back side.

Just add cars.

Fold in half, then roll!

Secure with elastic cord and you are ready for some fun on the go!!
Thanks for reading, please comment if you have any suggestions on posts, something you'd like to see, or any mistakes {even typos} that need to be corrected.
Happy Crafting.
2 comments:
i love your fabrics! great job.
Available in any colour or font we can fully personalise your car floor mats making this product a great gift for christ,as. Car Mats
Post a Comment